

Are you thinking about painting your kitchen cabinets, but dread the thought of sanding them first? If so, you’re in luck! There are a few ways that you can paint your cabinets without having to sand them first. In this blog post, we’ll walk you through the steps of how to paint kitchen cabinets without sanding. We’ll also provide some tips and tricks for getting the best results possible. So if you’re ready to tackle this project, read on!
Tips for a Successful project
1. Start with a clean surface. Make sure your cabinets are free of dirt and grease before you start painting.
2. Use a primer. This will help the paint adhere to the surface and give you a smooth finish.
3. Choose the right paint. Use a high-quality paint that is designed for use on cabinets.
4. Follow the directions. Be sure to read the instructions on your paint can before beginning the project.
5. Take your time. Don’t rush the job – take your time to do it right, and you’ll be rewarded with beautiful results!
Materials Needed
-Paint
-Paintbrushes
-Rollers
-Painter’s Tape
-Drop Cloths
-Sandpaper (optional)
If you’re planning on painting your kitchen cabinets, you’ll need to gather a few supplies before getting started. You’ll need paint, of course, along with paintbrushes, rollers, and painter’s tape. Drop cloths are also a good idea to protect your floors from paint spatters. If you want to sand your cabinets before painting them, you’ll need sandpaper as well.
Step-by-Step Guide
1. Start by thoroughly cleaning your cabinets. This will remove any grease or dirt that has built up over time.
2. Once your cabinets are clean, use a degreaser to remove any remaining residue.
3. Next, sand your cabinets with a fine-grit sandpaper. This will help create a smooth surface for the new paint to adhere to.
4. Once you have sanded your cabinets, wipe them down with a damp cloth to remove any dust particles.
5. Now it’s time to paint! Begin by painting the inside of your cabinets first, then move on to the outside surfaces. Use a high-quality paintbrush or roller for best results.
6. Allow the paint to dry completely before moving on to the next step.
7. Finally, apply a clear sealer over the entire surface of your painted cabinets to protect them from wear and tear in the future.”
Preparing the Cabinets
If your cabinets are in good condition and you don’t feel the need to sand them down beforehand, you can skip this step altogether. However, if your cabinets could use a little TLC, sanding them before painting is a great way to ensure that your paint job will look its best.
To sand your cabinets, you’ll need to use a fine-grit sandpaper. Start by lightly sanding the surfaces of your cabinets with the grain of the wood. Once you’ve gone over the entire surface, focus on any areas that seem particularly rough or damaged.
Once you’re finished sanding, wipe down your cabinets with a damp cloth to remove any dust or debris. Then, let them dry completely before proceeding to the next step.
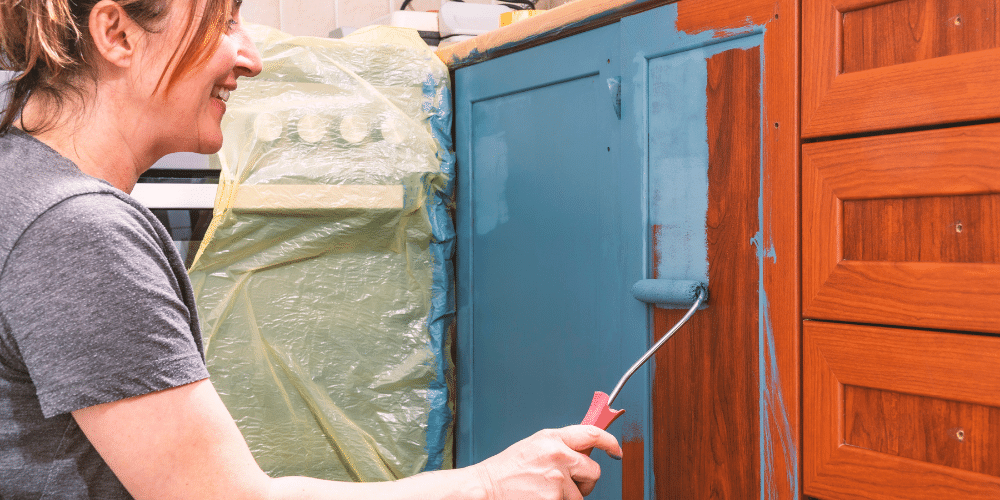
Painting the Cabinets
If you’re looking to give your kitchen a fresh new look without having to go through the hassle of sanding down your cabinets, then painting them is the way to go! Here’s a step-by-step guide on how to achieve this:
1. Begin by thoroughly cleaning your cabinets with a degreaser. This will help the paint adhere better and also make sure that any dirt or grime is removed.
2. Once they’re clean, apply a primer designed for use on laminate surfaces. This will help the paint stick and also provide a nice base for the topcoat.
3. When choosing your paint, make sure to get one that’s specifically designed for use on cabinets. This will ensure that it will be durable and long lasting.
4. To avoid any brush strokes, use a foam roller to apply an even coat of paint to the cabinets. Start with the doors first and then move on to the frame and drawers.
5. Once everything is painted, allow the paint to dry completely before adding new hardware or putting everything back in place.
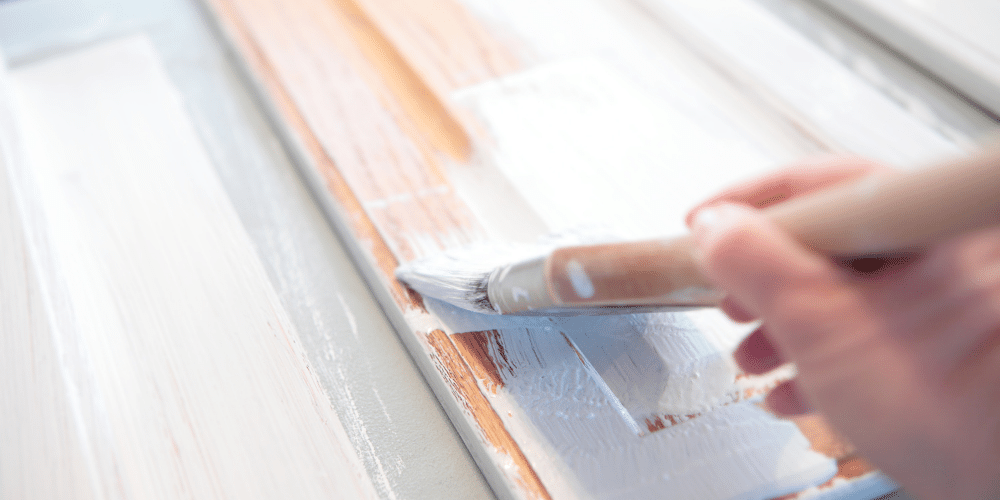
Adding the Final Touches
Once you have your paint color picked out and your cabinets prepped, it’s time to start painting! To get the best results, use a high-quality paintbrush or roller and paint in long, even strokes. Start with the door fronts and then move on to the cabinet boxes and drawers.
If you’re using two colors like we did, paint the upper cabinets one color and the lower cabinets another. We used a semi-gloss finish for both colors. Keep in mind that semi-gloss will show any imperfections more than a flat or eggshell finish, so make sure your surfaces are as smooth as possible before painting.
Once all of your painting is complete, let the paint dry for at least 24 hours before rehanging the doors and drawers. Then step back and enjoy your new kitchen!
Maintaining Painted Cabinets
It is possible to paint kitchen cabinets without sanding, but there are a few things you need to do in order to prepare the surface for painting. First, clean the cabinets thoroughly with a degreaser or TSP solution. This will remove any grease or dirt that could prevent the paint from adhering properly. Next, use a fine-grit sandpaper to lightly sand the cabinet doors and surfaces. This will create a smooth surface for the paint to adhere to. Finally, wipe down the cabinets with a damp cloth to remove any dust from sanding.
Once you have prepped the cabinets for painting, you can begin painting them using a brush or roller. Start with a primer designed for use on laminate surfaces, such as Zinsser Bulls Eye 1-2-3 Primer. This will help the paint adhere better and provide a more even finish. Once the primer is dry, you can start painting with your chosen color of paint. Be sure to use a paint that is designed for use on laminate surfaces as well, such as Valspar Cabinet Enamel Paint.
Painting cabinets can be time consuming, but it is worth it in the end! By following these steps, you can achieve beautiful painted cabinets without having to sand them first!
What type of paint to use
When painting kitchen cabinets, it is important to choose the right type of paint. A high-quality latex paint is the best choice for most cabinets. If you have cabinets made of unfinished wood, oil-based paint is a good option. You will also need to consider the type of finish you want for your cabinets. A high-gloss finish is easy to clean but can show smudges more easily. A semi-gloss or satin finish is a good choice for most kitchens.
How to prep the cabinets
If your cabinets are in good shape and you just want to give them a new look, painting them is a great option. You don’t need to sand them first, but you will need to clean them thoroughly and prep them for painting.
To prep the cabinets for painting, start by removing all the doors and hardware. Then, use a degreaser to clean the cabinets, paying special attention to any areas that are greasy or have build-up. Rinse the degreaser off with water and let the cabinets dry completely.
Next, use painters tape to mask off any areas you don’t want painted, like the countertops or backsplash. Then, using a primer made for laminate surfaces, prime the cabinets. Once the primer is dry, you’re ready to paint!
Painting the cabinets
If you’re painting your kitchen cabinets without sanding, you’ll need to start with a deglosser or primer. Once you’ve applied the deglosser or primer, you can begin painting your cabinets with a brush or roller. For best results, use a high-quality paint designed for cabinets.
Sealing the cabinets
Before you can paint your cabinets, you need to prep them by cleaning and sealing the surfaces. This will help the new paint to adhere properly and create a smooth, professional-looking finish.
To clean your cabinets, start by wiping down all of the surfaces with a damp cloth. If they are particularly greasy or dirty, you may need to use a mild degreaser or cleaner. Once they are clean, dry them completely with a clean towel.
Once your cabinets are clean, it’s time to seal them. This will help to create a barrier between the old paint and the new paint, and will also help the new paint to adhere better. You can use either a primer or a sealer for this step – just make sure it is compatible with the type of paint you will be using. Apply the primer or sealer evenly over all of the surfaces, following the manufacturer’s instructions. Allow it to dry completely before proceeding to painting.
Conclusion
If you’re looking for a way to update your kitchen without spending a lot of money or time, painting your cabinets is a great option. With a little bit of elbow grease, you can transform your tired old cabinets into something fresh and new. And, best of all, you don’t need to sand them first! Just follow our simple tips and you’ll be able to paint your cabinets without any hassle.


Leave a Reply