
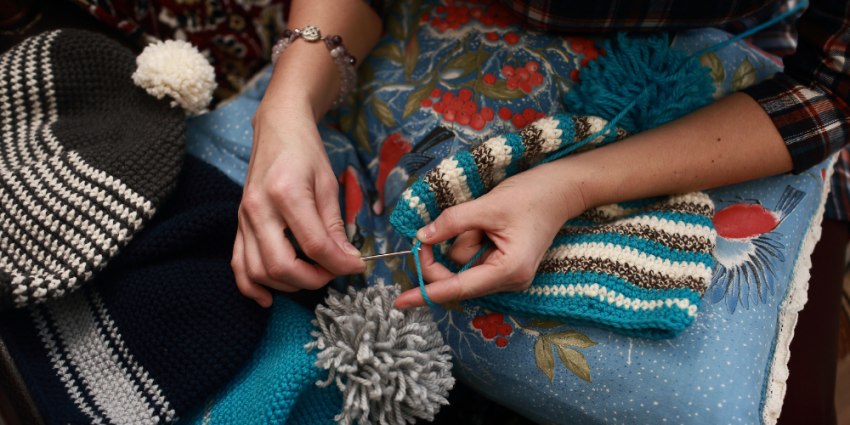
Crochet is one of the oldest crafts still practiced today. It’s a versatile craft that can be used for a variety of projects, from blankets to hats. If you’re new to crochet, or just want to learn some easy tips for crocheting a beanie, read on!
In this article, we will walk you through the basics of crocheting a beanie. We will give you instructions on how to crochet a basic beanie pattern, and also provide some tips for beginners. If you follow our instructions, you will have a beautiful and well-made beanie in no time at all.
What You’ll Need
To crochet a beanie for beginners, you’ll need a few things. In addition to a crochet hook and yarn, you’ll need to have some basic stitches learned. These stitches include chain, single crochet (sc), double crochet (dc), and loop (lp). Once you have these basics down, it’s easy to create this cozy hat.
To start your beanie, chain 24 (or as many as necessary to make the desired size). Make 2 sc in the first ch and 1 sc in each of the next 21 ch. Join with a lp to form a ring.
Rounds 3-6: Ch 2 (does not count as st) *Sc in next ch, dc in next ch; rep from * around. Join with a lp to form the second ring.
Round 7: Ch 2 (does not count as st) *Sc in next sc, dc2tog tbl; rep from * around. Join with a lp to form the third ring. Break off yarn and tie off end.

How to Crochet a Beanie
If you’re new to crochet a beanie, or just looking for a beginner project to work on, a beanie is a great choice! This simple Crochet Beanie tutorial will walk you through the basics of this popular crochet project.
First, you need to create a basic circle in your desired size using either an adjustable ring or magic loop. If using an adjustable ring, make sure to adjust the tension as you go so that the circle is evenly tight.
Once your circle is created, start working in rounds beginning with a chain 1 (or any other starting chain). Round 1 will require you to sc in the first stitch of your round and then sc in each stitch around. Do not join your rounds; simply keep working scs until you reach the end of your round.
When it comes time to increase your stitches, work 2 sc in each stitch around (4 stitches per round). Be sure not to twist these stitches; if they begin to twist, pull them together gently before continuing. Once all of your stitches have been increased, it’s time to decrease back down again. Work 1 sc in each stitch around (2 sts per round), being careful not to twist these newly decreased stitches. Finish off by crocheting into the remaining ends and securing them with a knot. If desired, you can add some pompoms or felting for extra warmth!
Tips to Crochet a Beanie
If you are new to crochet a beanie, or just need a few tips for creating the perfect beanie, keep reading! Here are some basic tips to help you crochet a cozy hat:
-Start by doing a chain stitch. This will ensure that your beanie is long enough to reach your head.
-Next, work in rounds. Remember to join your stitches together with a slip stitch at the end of each round.
-Continue crocheting until your beanie is the desired length. To finish it off, add a little extra yarn at the end and weave in any loose ends.
Now that you know how to crochet a beanie, put these steps into practice and enjoy creating your very own masterpiece!
What is a beanie?
A beanie is a simple accessory that can add flair to any outfit. It’s easy to crochet, and the resulting product can be customized in many ways.
This tutorial will show you how to crochet a beanie using standard crochet stitches. Once you have mastered this pattern, you can experiment with different color combinations and also add some embellishments, such as flowers or leaves.
Beanie knitting directions
Crochet a beanie for beginners
If you’re new to crochet, or if you’ve been crocheting for years but never attempted a beanie, now is the time to give it a try! This easy crochet beanie is simple to make and provides hours of fun.
To begin, chain 48 (52), then join with a slip stitch in the first chain to form a ring.
Round 1: Ch 3 (counts as 1st dc), dc in same ring, *ch 3, sk next dc, dc in next dc; rep from * around.
Round 2: Ch 2 (counts as 1st dcth), dcth in each of the first two dc, ch 3, sk next ch-3 sp, dc in next dcth, ch 3.
Round 3: Ch 2 (counts as 1st dcth), dcth in each of the first three dc, ch 2, sk next ch-2 sp, dc in next dcth. Fasten off and weave in ends.
Hat assembly instructions
If you’re a beginner crocheter, or just need a refresher on the basics, these Hat Assembly Instructions will walk you through the entire process. Once you have all of your pieces ready, follow our easy steps to create your very own beanie!
To start, grab your yarn and make a slip knot. Leave a long enough tail for sewing.
Now, measure out 2 inches from the top of your head and mark with a pencil. Now crochet in rounds starting at this mark and increase 1 stitch every time you go around (2 stitches total). You should have 6 rounds completed by now.
Next row: (counts as first dc), dc in next 2 sts, ch 2, skip next st, dc in next st. Turn.
Third row: Skipping over ch-2 space, work dc in each of next 3 sts, *ch 2, skipp next st; rep from * to end. Turn.
Fourth row: (dc in each of first 2 sts), *ch 2; skipp next 3 sts; rep from * to end. Turn.
Fifth row: (dc in each of first 3 sts), *ch 2; skipp next st; rep from * to end. Turn.
Sixth row: Work as Fourth Row plus one more dc after last ch-2 space – 7 DC in total = 8th row worked.
What to do if you run out of yarn
If you run out of yarn when you crochet a beanie, the easiest solution is to use a different type of yarn. You can also try using a crochet hook that is smaller or working in a different stitch pattern.
FAQ’s for crocheters
Crocheters are often asked about their favorite tips and tricks for crochet. This FAQ section will cover some of the most common questions about crochet.
Q: What is the difference between crocheting in the round and in rows?
A: Crocheting in rounds is typically more comfortable because it doesn’t put pressure on your hands. You also can’t go wrong with this method if you’re new to crochet as you can always return to your beginning round if you make a mistake. Crocheting in rows, while not necessarily more difficult, gives a more finished look to your project since all of the stitches line up vertically.
Q: How do I change colors when crocheting?
A: To change colors, simply hold the new color up next to the old color and pull through both colors at the same time (as if making a single crochet). Make sure not to twist the yarn! If you’re having trouble changing colors, try using a different hand technique such as holding two strands of yarn together instead of one.
Q: How do I make a basic stitch?
A: To make a basic stitch, hold your yarn over the hook like you would for a regular stitch and insert your hook from below upward through the center of the “V” created by your two fingers (or use another hand grip). Pinch your fingers slightly so that they form an “L” shape with your thumb and first 2 fingers. Then pull the yarn through both fingers.
Q: How do I make a DC (double crochet)?
A: To make a DC, yarnover (see definition below) first by holding the yarn over the hook like you would for a regular stitch and insert your hook from below upward through the center of the “V” created by your two fingers. Then, pull the yarn through both fingers. You can also just hold the yarn over the hook and draw it through the front loop only (not through both loops).
Q: What is a yarnover?
A: A yarnover is a technique used to increase or decrease stitches in a row. To do a yarnover, hold your yarn over the hook like you would for a regular stitch and insert your hook from below upward through the center of the “V” created by your two fingers. Then, pull the yarn through both fingers.
The Basic Crochet Stitch
The basic crochet stitch is used to create most of the shapes in crochet. It’s a simple, symmetrical pattern that can be worked in any direction. The basic crochet stitch is also the foundation of many more advanced stitches, so it’s important to understand it before trying them out.
To begin crocheting with the basic crochet stitch, hold your yarn in your left hand and your hook in your right hand. Make a circle with your hook by making a loop with the yarn and drawing through the loop (see image below). Then make another loop closer to the first one (see image above). You now have two loops on your hook.
Insert your hook into the first loop, then pull up a loop (the new loop will now be on top of the old one), and insert your hook into the second loop (see image below). You now have three loops on your hook.
Yarn over again and draw through all three loops on your hook (see image below). This completes one row of the basic crochet stitch. To continue crocheting, repeat these steps — making sure to keep track of which loop you’re working in — until you reach the desired length or height for your beanie.
How to Make a Chain
If you want to learn how to crochet a beanie, start by making a chain. This is the first step in any crochet project. Make a chain that’s about twice as long as the desired size of your beanie. For this tutorial, we’ll be using the following chain:
Ch 20.
Row 1: Sc in second ch from hook and each remaining ch, (ch 2, sc) twice. Change to A and work Row 2 of pattern.
Do not turn your work. Continue crocheting until your hat is the desired size; end with a slip stitch in first sc. Trim off excess yarn and weave in ends.[/content]
The Slip Stitch
The slip stitch is a very basic crochet technique that can be used to create a variety of patterns. To do the slip stitch, insert your hook into the next stitch before the current stitch and pull up a loop.Insert yourhook into the next stitch andpull up a loop. Yarn over and pull through both loops on your hook.
How to Make a Foundation Row
Crocheting a Foundation Row is the first step in making a crochet beanie. This row establishes the foundation of your work and will determine the shape of your hat.
To make a Foundation Row, chain any number of stitches to get the desired length, then round off the end. To start your Foundation Row, insert your hook into the first chain from the hook and pull up a loop. Yarn over once, and draw through both loops on the hook (1 loop left on hook). Do this again (2 loops left on hook), then yarn over and draw through all three loops on the hook (1 loop remains). You’ve just made 1 double crochet (= 2 single crochets together).
Chain 1 and do 1 double crochet in each remaining stitch across row = 4 crochets. Switch to light green yarn and continue working these instructions: *Yarn over, draw through two loops on hook (3 loops remain), rep from * until last stitch, yarn over, draw through all 3 loops on hook = 1 beanie ring (= 6 stitches). Fasten off colour.
To finish your Foundation Row, work 1 slip stitch in each of the 6 stitches (= 6 slip stitches total) = 0 ch-1 sps. Fasten off yarn.
How to Increase or Decrease the Size of a Crochet Beanie
As a beginner crocheter, you may be wondering how to increase or decrease the size of a crochet beanie. Here are two methods:
1. Crochet in continuous rounds. When you finish a round, chain 2 and turn the work so that the chain 2 is now on the hook. Yarn over and pull through both loops on the hook (2 stitches increased). Do this again for every round until you want to make the hat larger or smaller.
2. Crochet in back loops only. When you finish a round, yarn over and pull through one loop only on the hook (1 stitch increased). Do this again for every round until you want to make the hat larger or smaller.
The Yarnover Method
The Yarnover Method is a simple but efficient way to crochet a beanie for beginners. This method uses basic stitches and can be completed in just a few minutes. The final product will be a snug hat that is warm and cozy.
To begin, chain three stitches and insert your hook into the first stitch. Yarn over and pull through both loops on the hook. Do this again in the next stitch, and then continue crocheting in this manner until you reach the end of the row. You will now have two loops left on your hook. Yarn over and thread these two loops through the remaining stitch on the previous row. Pull tight to close up the hole made by crocheting. You now have a completed row of stitches.
To start the next row, yarn over and pull through both loops on the hook. Do this again in the next two stitches, and then continue crocheting in this manner until you reach the end of the row. You will now have one loop left on your hook. Yarn over and thread this loop through the remaining stitch on the previous row. Pull tight to close up the hole made by crocheting. You now have a completed row of stitches – your beanie is half finished!
To finish off your beanie, simply follow these same steps but begincrocheting in reverse (yarn over, drawloop through 2 loops on hook, yarn over). Continue crocheting in this manner
The Double Crochet Cluster
The double crochet cluster is a quick and easy crochet project that can be used to create a beanie or other small hat. You will need to know how to make a basic crochet stitch, the double crochet, as well as how to chain and turn.
To start,Chain 4 (counts as 1dc, ch1), then make a double crochet in the fourth ch from the hook (see diagram).
Skip the next ch, make another double crochet in the next ch (this is your first cluster), then skip the next 2 chs and continue crocheting in the middle of the chain (see diagram).
Your beanie should now look something like this:
You can now turn your work so that the wrong side is facing and continue crocheting in this manner for an even length. When you reach the end of your round, slip stitch into first dc of previous round to close off.
The Triple Crochet Cluster
Crochet a beanie for beginners is easy with this triple crochet cluster pattern. This Cluster Beanie is worked in the round from the bottom up. You will need to know how to chain, single crochet and double crochet. The pattern includes instructions for working in the round and in rows. The finished size of this beanie will be about 21 inches circumference.
Conclusion
If you’re a beginner crocheter and looking for a hat to crochet, don’t despair! This tutorial will walk you through the basics of how to make a beanie, step-by-step. Whether you are a little unsure about beginning this pattern or just want some help getting started, we’ve got you covered. Happy crocheting!


:max_bytes(150000):strip_icc()/what-to-wear-any-occasion-586193b058954424a00609d683766f34.jpg)

Leave a Reply