
Trust me, I know just how frustrating this can be. For years, I’ve tried cleaning my makeup sponges and to no avail. They never seemed to come clean. not even after following the tedious steps I found from multiple sources online. It was on a whim that I came across an article on how to actually clean makeup sponges in 3 simple steps that led me to finally being able to get those nasty little suckers clean! Not only did this article have great instructions, but it also gave me a few extra tips that have actually worked for me!
Run your sponges under lukewarm water.
Sponges are one of the most commonly used cleaning tools around the house, but they can also be one of the dirtiest. If you’re using a sponge to clean your dishes, it’s probably covered in bacteria and food particles. In fact, a study in 2015 found that more than half of all kitchen sponges contain E. coli and other dangerous bacteria.
To keep your sponges clean and safe, follow these tips:
Run your sponges under lukewarm water before and after each use. This will help remove any leftover food particles or dirt from the sponge, which can cause stains on your dishes.
Rinse out your sponge after each use by running it under warm water until it feels clean again. If there is still food residue on your sponge, run it under hot water for about 30 seconds before rinsing again under warm water until it feels clean again.
If you don’t rinse out your sponge properly between uses, bacteria will build up quickly inside it — so make sure you always let it dry completely before storing away or putting away in its designated container!
Apply a soap or cleaner, and massage it thoroughly into the sponge using your hands.
Sponge Baths
A sponge bath is a simple, low-cost way to clean your dog. But you need to do it right to prevent injury or infection.
First, fill a tub with lukewarm water. Add a few drops of liquid soap and mix well. If you’re using a dry shampoo, add it now and mix again.
Dip your dog’s front legs into the tub first, then his back legs. Lift each leg out of the water and gently wipe down from front to back with a sponge or soft cloth (or just your hand) until all the dirt is gone. Lift the leg out of the water again and rinse off any soap residue with clean water from a spray bottle or hose attachment. If you don’t have access to running water, simply use clean towels instead of sponges or rags for this step — towels won’t scratch skin like sponges can!
Rinse until the foam is clear.
If your clothing is new, you may be able to remove grease stains by washing them in warm water with detergent and oxygen bleach. If this doesn’t work, try using dishwashing liquid with an oxygen bleach to clean greasy clothes.
If you have an old stain, use a pre-treatment product before putting the garment in the washing machine. Pre-treatments are available at most supermarkets and discount stores. Follow package directions carefully — some pre-treatments work better than others on particular stains.
Once your garments have been treated, put them into the washing machine with hot water (around 140 degrees Fahrenheit) and laundry detergent or dishwashing liquid containing oxygen bleach (it’s usually listed as sodium percarbonate). Use a heavy duty cycle on your washing machine if you have one — this will help agitate out any remaining grease from the fibers of your clothes.
Allow to air dry completely before re-using.
If you are using a towel to dry off after a shower or bath, follow these steps:
1. Discard the towel when it becomes soiled or worn out. Do not wash towels with other laundry.
2. Wash towels in hot water with detergent, bleach and vinegar only if they are colorfast (bleach will fade colored fabrics). Do not use fabric softener.
3. After washing, rinse towels thoroughly with warm water until no suds remain on the towel and spin dry in the dryer for 10 minutes at medium heat setting; do not over-dry or wring out excess moisture (this may cause lint build-up).
4. Dry your towel in a well-ventilated area so that it can air dry completely before reusing.
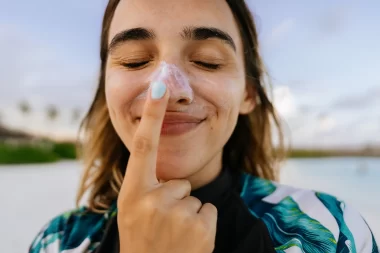
Clean makeup sponges last longer and are less likely to cause breakouts!
We all know that using a makeup sponge can be a bit of a pain. You’re constantly having to wash it, and then it dries out really quickly. But there’s another issue with sponges: They can cause breakouts.
The problem comes from the dirt and bacteria that builds up on your sponge — and then gets transferred onto your face. If you don’t clean your sponge regularly, it can lead to pimples and blackheads.
Luckily, there are a few ways you can keep your sponges clean and help prevent breakouts:
Wash them often — You should wash your sponge every day or every other day. You don’t need to use soap; just rinse them under warm water until they’re clean (or use a baby wipe). You should also replace your sponges every three months or so because they’ll start to wear down after that time period.
Use an antibacterial cleanser — This will help kill off any germs that might be on your sponge, which will keep acne at bay and ensure that you don’t transfer any bacteria to your face when applying makeup (or vice versa). It’s especially important if you have sensitive skin or tend to break out easily.


Leave a Reply