
During hot summer days, window-mounted air conditioners are one of the most popular ways to keep your home cool. But without proper care and maintenance, these units can suffer from dirt buildup, clogged filters, and other issues that can reduce their effectiveness and efficiency. If you want to keep your window air conditioner running smoothly, it’s important to clean it regularly. In this blog post, we’ll show you how to clean a window air conditioner in just a few simple steps. Read on to learn more!
Tools and materials
Assuming you have a window air conditioner unit, to clean it you will need a few supplies. First, you will need a Phillips head screwdriver to remove the front grille of the AC unit. Next, you will need a soft cloth or sponge and some soapy water to wash the front grille. Finally, you will need a vacuum with a brush attachment to clean the inside of the AC unit.
To start, unscrew the four screws holding the front grille in place with your Phillips head screwdriver. Be careful not to lose the screws! Once the grille is off, wash it with your soapy water and cloth or sponge. Rinse it off and let it dry completely before putting it back on the AC unit.
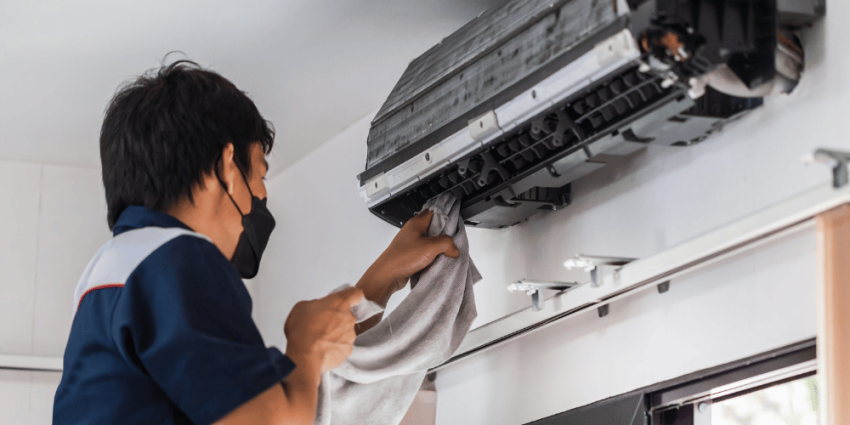
Now it’s time to clean the inside of the unit. First, remove any debris or dirt from around the edges of the unit with your vacuum brush attachment. Then, vacuum up any dust or dirt from the coils and other components inside the unit. Finally, wipe down all of the surfaces with a damp cloth to remove any remaining dirt or dust.
And that’s it! Your window air conditioner unit should now be clean and ready for use!
Disassembly
Assuming your window air conditioner has removable grilles, start by taking them off and setting them aside. Next, using a Phillips screwdriver, remove the outer casing of the unit. Once the casing is removed, you should be able to see the evaporator coils. These are the coils that actually cool the air, so it’s important to make sure they’re clean.
Use a soft brush or vacuum attachment to gently remove any dirt or dust that may have accumulated on the coils. Be careful not to bend or damage the coils as you clean them. Once they’re clean, replace the outer casing and screw it back into place. Finally, put the grilles back on and enjoy your newly cleaned air conditioner!
Cleaning the coils
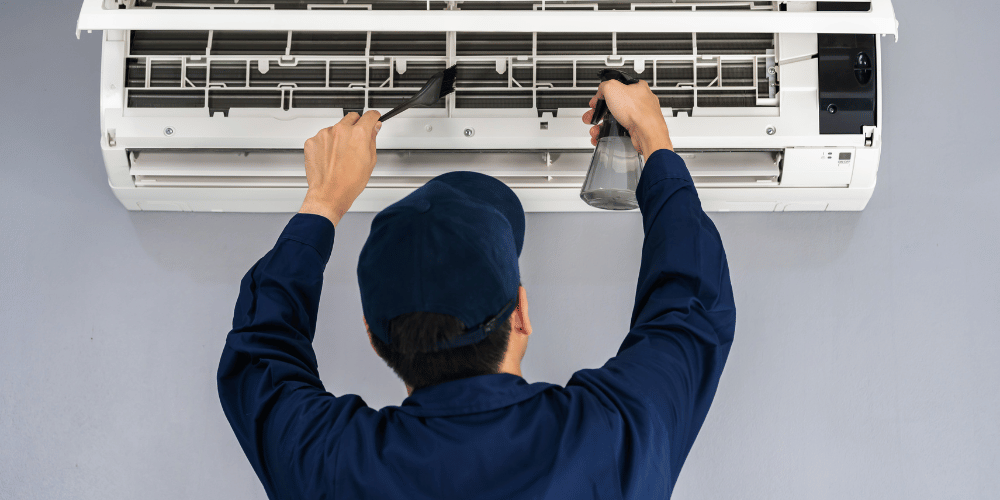
First, unplug your window air conditioner unit and remove it from the window. Next, remove the front grille and any other removable parts. With a soft brush attachment on your vacuum cleaner, gently vacuum the coils on both the inside and outside of the unit. Be sure to vacuum both sides of the coils thoroughly. If you see any dirt or debris build-up on the coils, use a coil cleaning solution and a soft brush to clean them. Once you’ve cleaned the coils, reassemble your unit and place it back in the window.
Cleaning the housing unit
If your window air conditioner has a front grill, remove it and wash it in soapy water. Rinse the grill and dry it thoroughly before putting it back on the unit.
Next, use a vacuum cleaner with a soft brush attachment to clean the cooling coils and fan blades. Be sure to vacuum both the inside and outside of the coils. If they’re very dirty, you may need to clean them with a coil cleaning solution.
Once the coils are clean, wipe down the inside of the air conditioner unit with a damp cloth. If there’s any build-up on the surface, you can use a mild cleanser or white vinegar diluted in water.
Finally, replace the filter according to manufacturer’s directions. A clean filter will help your air conditioner run more efficiently and prevent build-up on the coils.
Reassembly
Assuming your window air conditioner has been unplugged and removed from the window, start by giving it a good rinse with a hose. If your unit is particularly dirty, you can use a mild soap. Next, use a soft brush to clean the blades of the fan. Be careful not to bend or damage the blades. Once the blades are clean, use a rag to wipe down the inside and outside of the unit. If there are any areas that are difficult to reach, you can use a small brush or toothpick to get into those spaces. Once you’ve cleaned all visible dirt and grime, rinse the unit one more time with clean water. Allow the unit to air dry completely before reassembling and reinstalling it in your window.
Tips and advice
Your window air conditioner works hard to keep you cool all summer long, so it’s important to keep it clean and well-maintained. Here are some tips and advice on how to clean a window air conditioner:
1. Start by unplugging the unit and removing it from the window.
2. Next, disassemble the unit according to the manufacturer’s instructions. This will usually involve removing the front grille, fan blades, and other components.
3. Clean all of the removed parts with warm, soapy water. Be sure to rinse them thoroughly and dry them completely before moving on.
4. Now it’s time to clean the interior of the unit itself. Use a soft cloth or brush to remove any dust or dirt buildup from the coils and other surfaces. Again, be sure to rinse thoroughly and dry completely before reassembling the unit.
5. Once everything is clean and dry, reassemble the unit and reinstall it in the window. Plug it in and turn it on – your air conditioner should be good as new!
Disassembling the Unit
If your window air conditioner is in need of a good cleaning, you can disassemble the unit and clean it yourself. This is a relatively simple process that anyone can do.
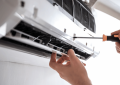
First, unplug the unit from the wall outlet and remove it from the window. Next, remove the front grille by unscrewing the screws that hold it in place. After the grille is removed, you will be able to see the evaporator coils.
Use a soft brush or vacuum attachment to clean the dust and debris from the coils. Be careful not to bend or damage the coils. Once they are clean, put the grille back on and screw it in place.
Now you can clean the outside of the unit with a mild soap and water solution. Rinse it well and dry it before putting it back in the window. Plug it in and turn it on, and you’re all done!
Cleaning the Filter
Assuming you have a window air conditioner unit, the first thing you want to do is unplug it and remove the front panel. Locate the filter (usually near the top front of the A/C unit) and remove it. Cleaning the filter is simple–just rinse it with warm water and let it air dry completely before putting it back in place.
Cleaning the Housing and Blades
It is important to clean the housing and blades of your window air conditioner on a regular basis. If you do not clean the housing and blades, the air conditioner will not be able to circulate air properly and will eventually break down.
To clean the housing and blades of your window air conditioner, you will need a soft cloth, a vacuum cleaner with an attachment hose, and a mild soap. Begin by unplugging the air conditioner from the wall outlet. Next, use the soft cloth to wipe down the outside of the housing. Be sure to remove any dust or dirt that has accumulated on the housing.
Once the housing is clean, use the vacuum cleaner with an attachment hose to remove any dirt or dust that has accumulated on the blades of the air conditioner. Be careful not to damage the blades while you are cleaning them. Finally, rinse off the blades with a mild soap and water solution. Allow the blades to dry completely before plugging in and using your window air conditioner again.

Assembling the Unit
Assuming you have all the necessary tools, assembling the window air conditioner unit is a fairly straightforward process. First, attach the bracket that came with the unit to the window sill. Make sure it is level and secure before moving on.
Next, place the AC unit in the window so that the exhaust hose is pointing outwards. Again, check that it is level before proceeding. Once you’re satisfied with its placement, begin attaching the side panels of the AC unit to the bracket.
Once both side panels are in place and secure, connect the exhaust hose to the exhaust port on the back of the unit. Make sure it is snug and will not come loose easily. Finally, plug in the AC unit to an outlet and turn it on.
Maintaining Your Window Air Conditioner
In order to keep your window air conditioner in optimal working condition, it is important to regularly clean the unit and replace the filter. Depending on the model, the frequency with which you need to do these things may vary. However, as a general rule of thumb, you should aim to clean the unit once a month and replace the filter every three months.
To clean the unit, start by disconnecting it from power. Next, remove the front grille and any other removable panels. With a soft cloth or brush attachment for your vacuum cleaner, gently remove any dust or debris that has accumulated on the coils and other components. If there is any build-up of grime or dirt, you can use a mild detergent to wipe it away. Be sure to rinse thoroughly and dry completely before reassembling the unit and reconnecting it to power.
When changing the filter, again begin by disconnecting power to the unit. Locate the old filter and carefully remove it, taking note of which way it was facing. Install the new filter in its place, making sure that it is facing in the correct direction. Once installed, close up the unit and turn it back on.
Conclusion
Cleaning your window air conditioner is a simple process that will help ensure it runs smoothly and efficiently. With these easy steps, you should now have the knowledge to clean your window air conditioner properly. Remember to turn off the power before cleaning and use only a soft cloth or sponge when wiping down the surfaces of your unit. Taking good care of your AC unit can help extend its life while improving energy efficiency in the long run.


Leave a Reply